
Products
DJI Terra Firmware Update: More Precise Point Clouds, Generate Drone LiDAR DEMs, And View Cross-sections
Enhance your drone LiDAR data analysis with DJI Terra's firmware update.
New updates in DJI Terra increase the precision of LiDAR point clouds and enable the generation of Digital Elevation Models from classified points clouds;
Improved DEM generation algorithm supports the generation of DEM data in a Tiff format;
Updates provide thinner and less noisy point clouds;
See examples of the point cloud to DEM conversion, and how point clouds can be made more precise, using a sample dataset collected by heliguy™ with the DJI Zenmuse L2;
Update (November 2023): Added support for viewing output profile for LiDAR point cloud reconstruction missions. See dataset examples.
DJI Terra can now generate Digital Elevation Models from classified LiDAR points clouds, thanks to a firmware update.
And recent upgrades increase the precision of points clouds for greater accuracy.
DJI Terra now also supports cross-sections (viewing output profile) for LiDAR point cloud reconstructions.
These enhancements are part of firmware V3.9.2, V3.9.0 - coinciding with the launch of the DJI Zenmuse L2 LiDAR and photogrammetry payload - and the slightly earlier V3.8.0 update.
Previously, LiDAR data could be classified through Terra, but would require third-party software, like Terrasolid, to generate a DEM.
Now, this can be conducted entirely within Terra - as the side-by-side images below show. This workflow will be covered later in the blog.
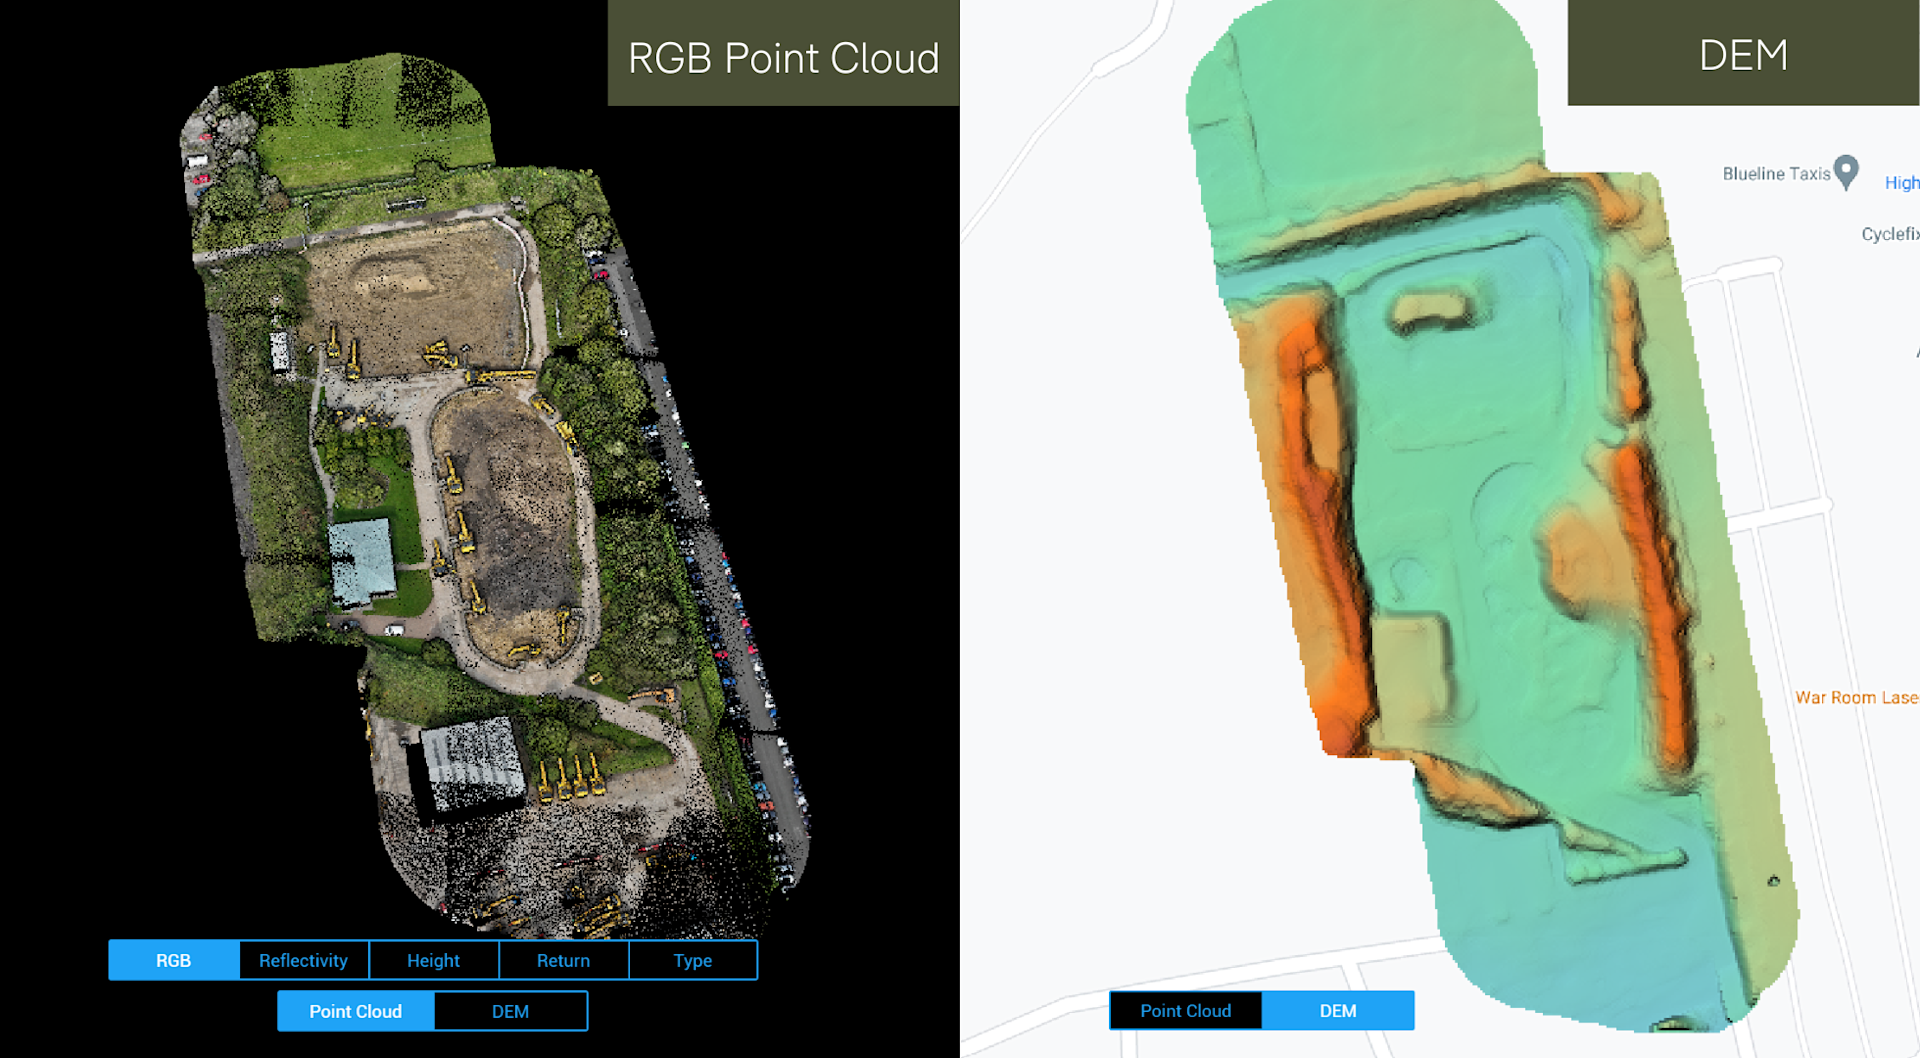
And the improved DEM generation algorithm supports the generation of DEM data in a GeoTIFF format - containing georeferencing information and is commonly used throughout the geospatial community.
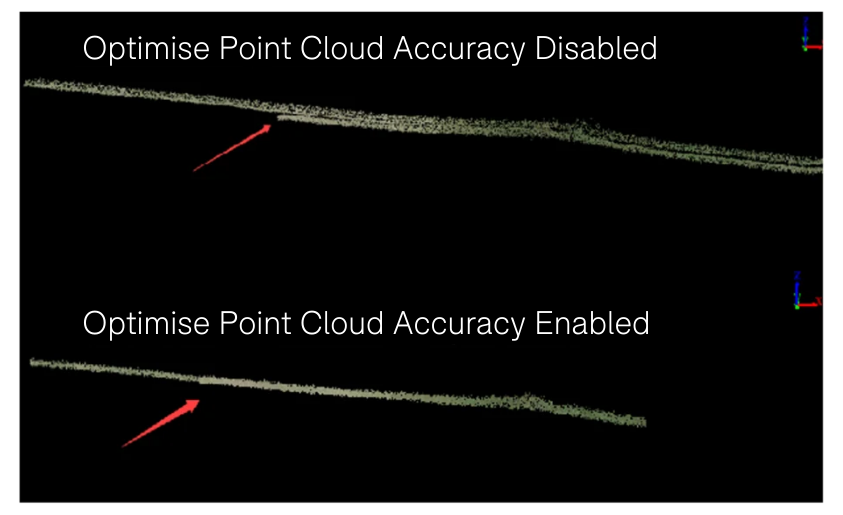
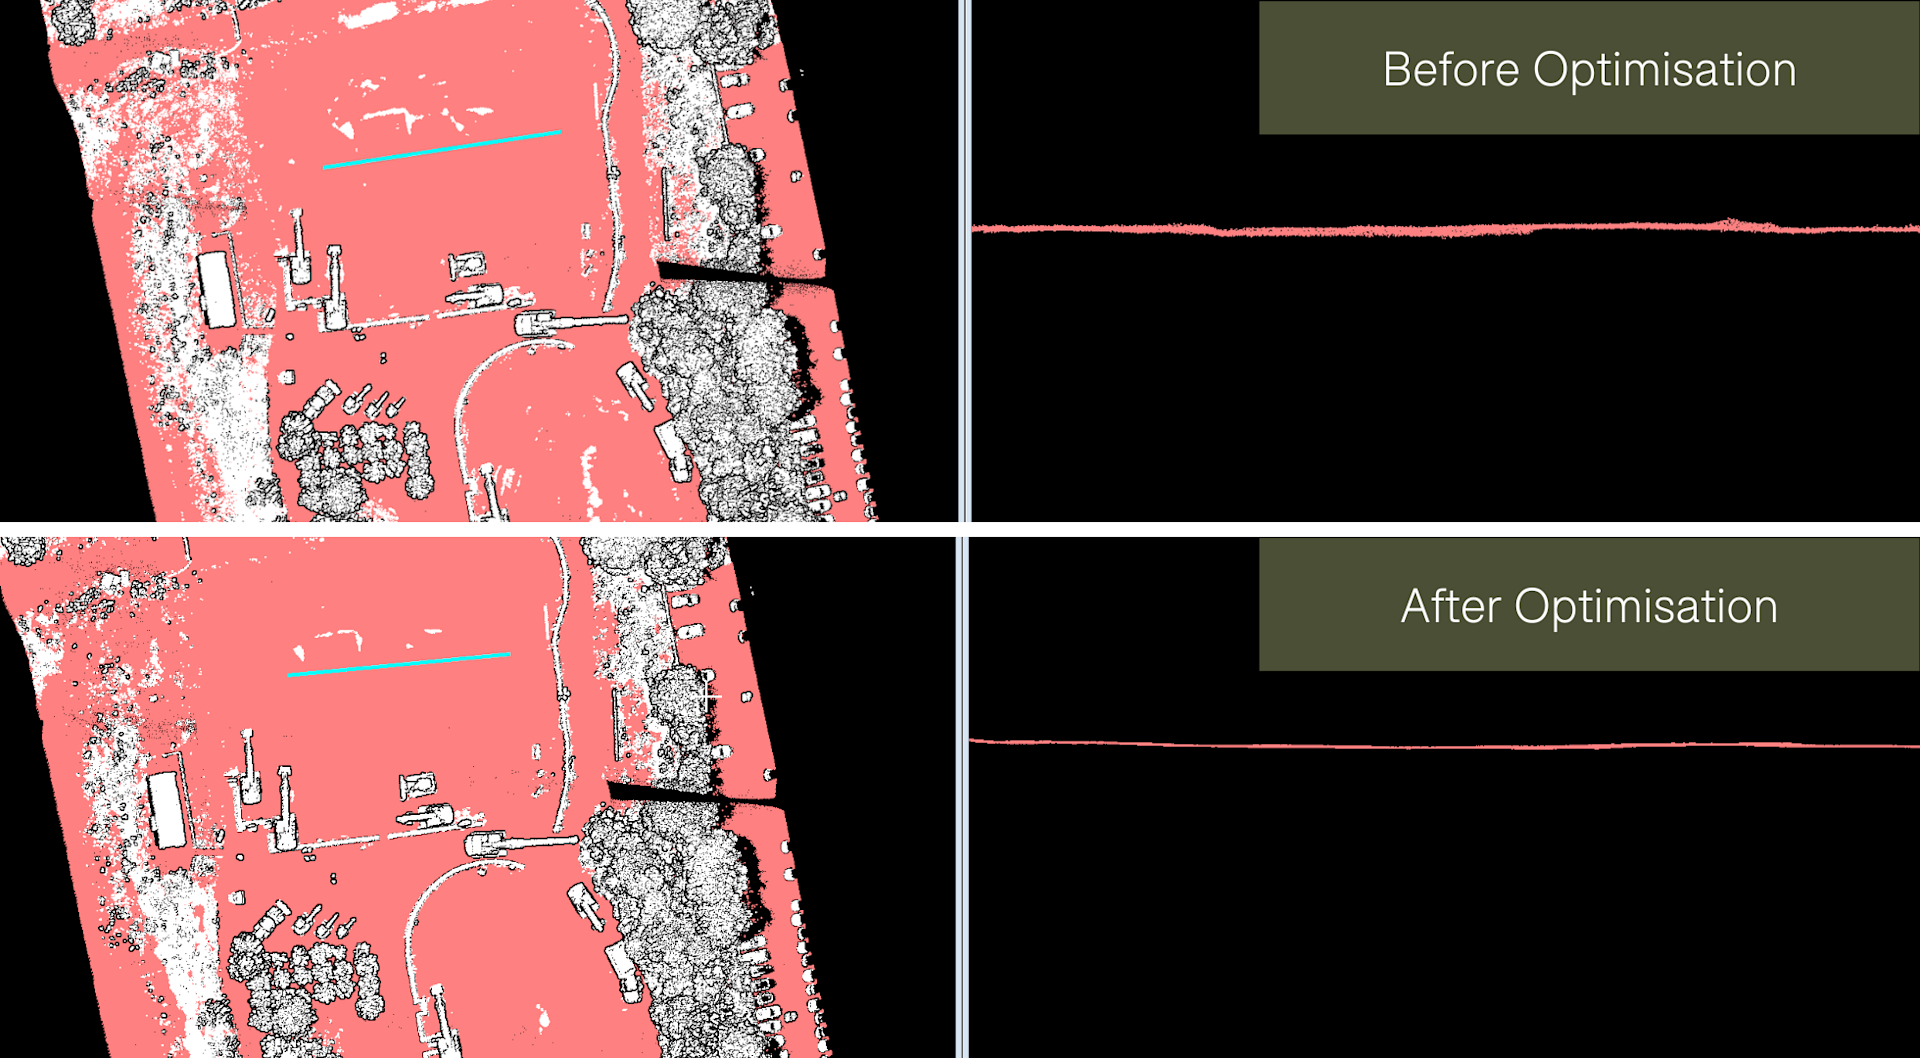
On top of this, Terra's Optimise Point Cloud Accuracy feature has been improved, reducing point cloud stratification phenomenon.
This results in thinner point clouds and shapes that are more accurately described, yielding higher overall consistency and accuracy and more precise point clouds.
The image below illustrates how excess noise can be removed and the data thinned.
Furthermore, the V3.9.0 update enhances the Smooth Point Cloud function, reducing point cloud density to about 1/3 of previous Terra versions.
And the V3.9.2 update allows users to view cross-sections of the dataset. This is ideal for further interrogation of the dataset - particularly useful in vegetated areas allowing you to see into the canopy.

The quality report for point clouds has been further improved, providing better visualisation and more intuitive data representation.

The recent round of improvements follow the substantial V3.7 update - released earlier this year - which included features such as automatic LiDAR ground classification.
This suite of upgrades make DJI Terra a more comprehensive and complete solution for LiDAR point cloud processing.
Generating A DEM In DJI Terra: Workflow
DJI Terra's new end-to-end workflow for DEM generation is a welcome step.
DEMs are an important surveying output, containing only terrain elevation information. They can be used for applications such as infrastructural management; hydrology and flow-direction studies; and land-use planning.
Find out more in our guide to DEMs and differences to DTMs and DSMs.
This is how you generate a DEM in DJI Terra, using data collected by heliguy™ with the DJI Zenmuse L2 as an example.
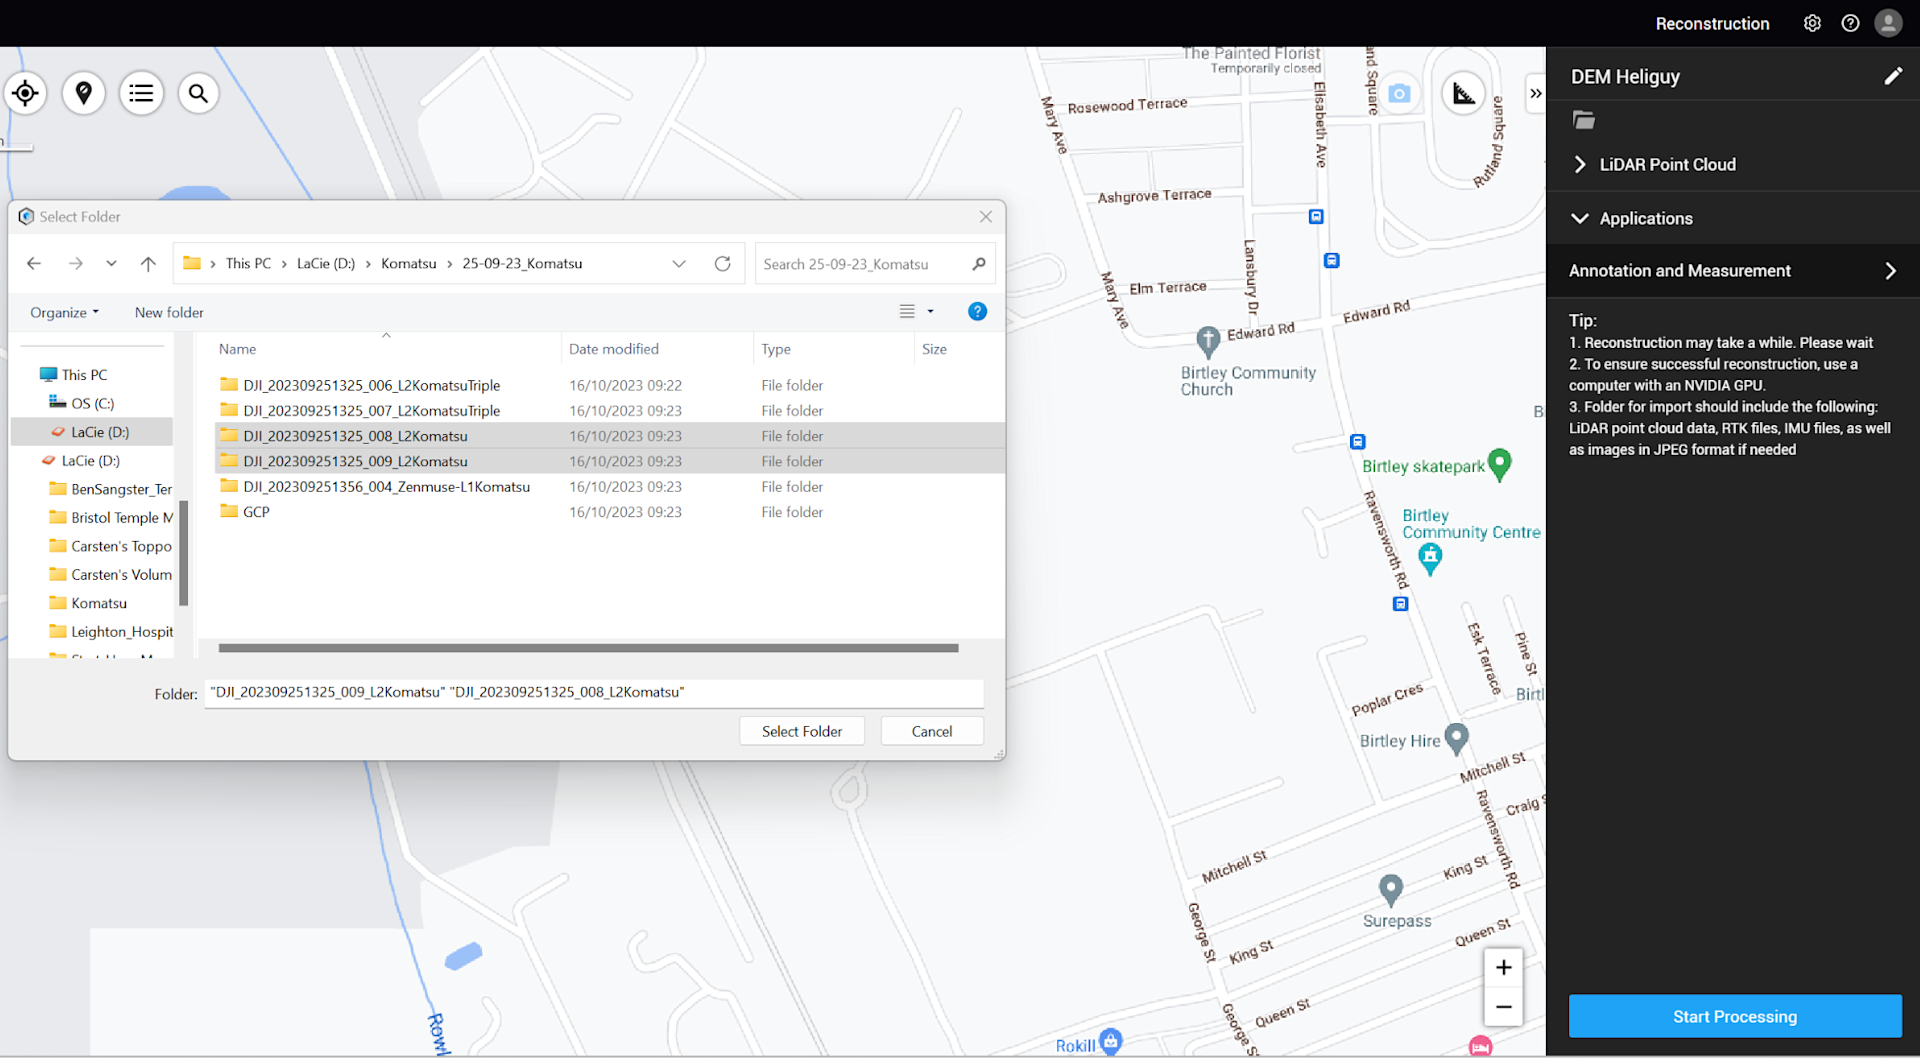
1: Start a new LiDAR project and click on the folder in the top right to add your data.
2: Once imported, tick the 'Generate DEM' option under Point Cloud Processing. At this stage, Terra will conduct automatic ground classification, eliminating surface structures such as trees and buildings.
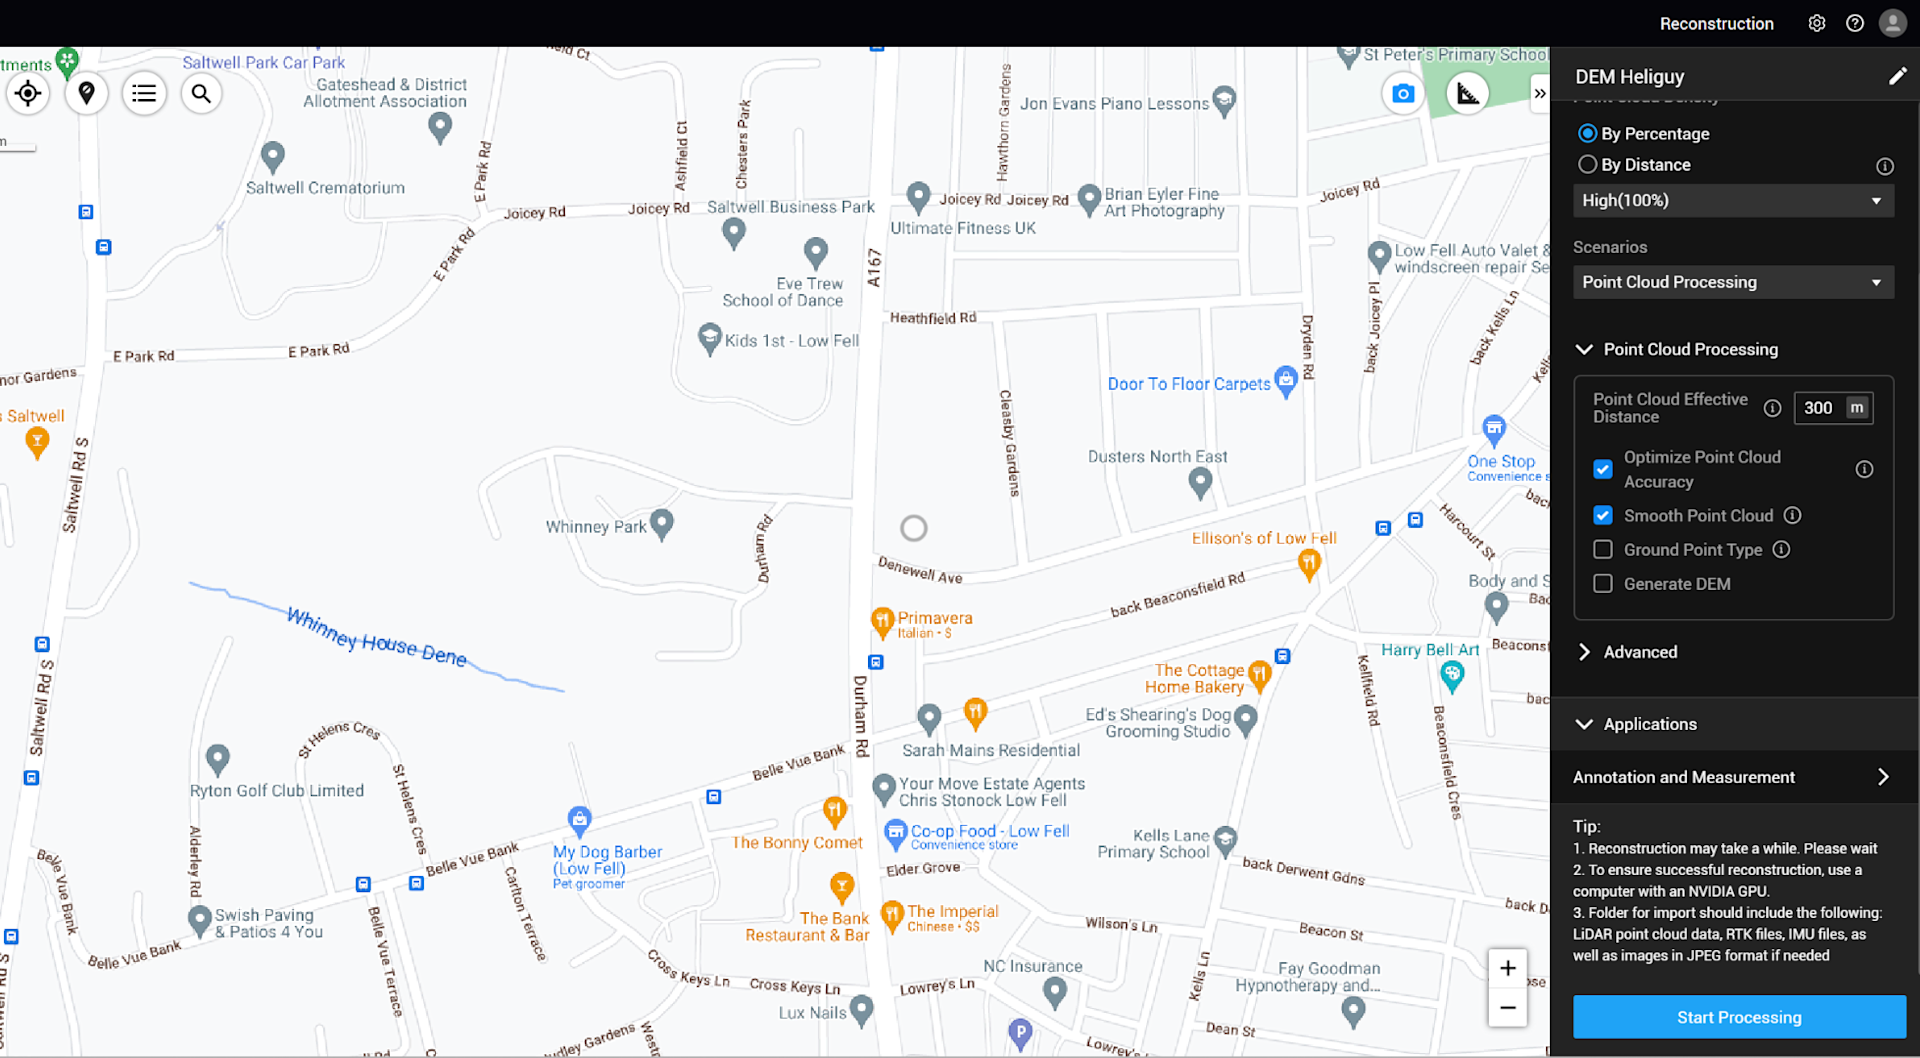
Notice how the Optimise Point Cloud Accuracy and Smooth Point Cloud options - mentioned earlier in the blog - have been ticked.
And, this graphic below illustrates the difference before and after optimisation: The cross-section of an area of ground (depicted by the turquoise line on the images on the left) is thinner and tighter following optimisation.
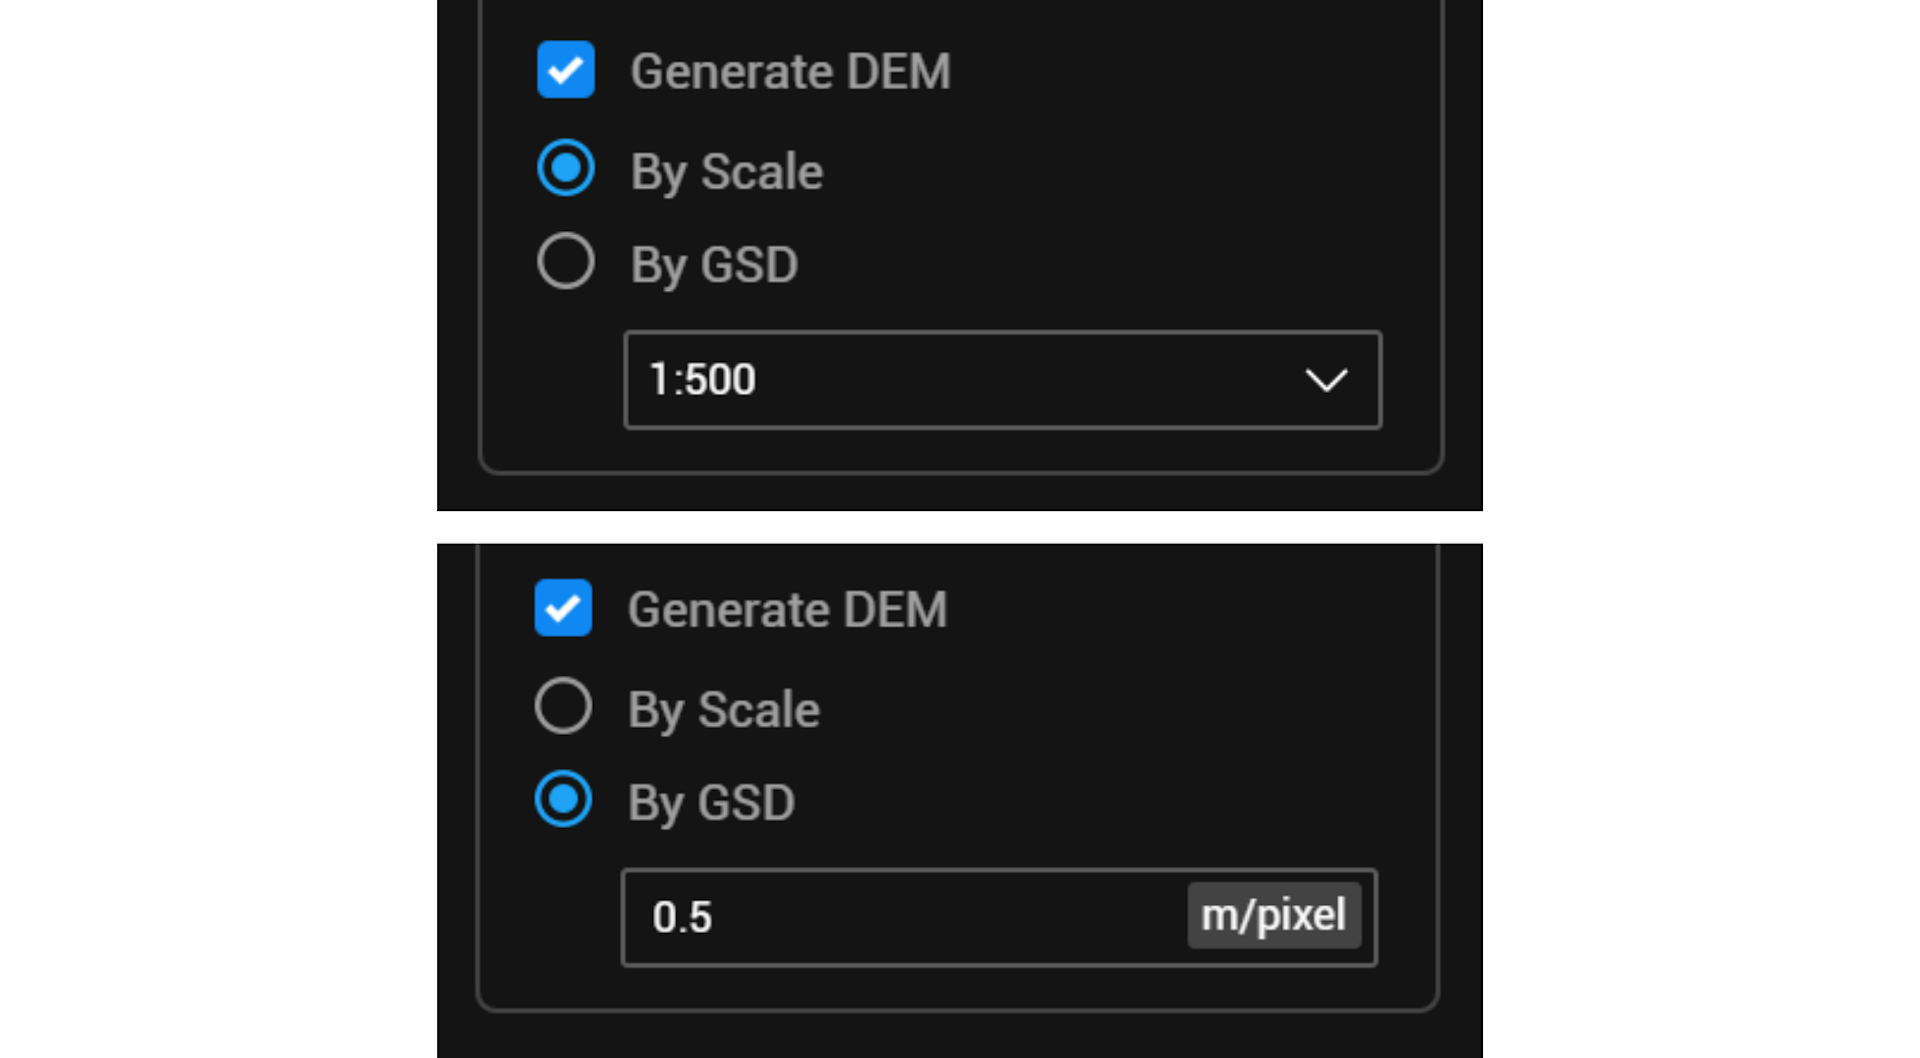
3: Two options are provided for DEM generation:
Generate By Scale: Supports user-defined DEM results with 1:500, 1:1000 and 1:2000 scales.
Generate By GSD: Results resolutions based on Ground Sampling Distance (GSD).
Scale | GSD |
1:500 | 50cm |
1:1000 | 100cm |
1:2000 | 200cm |
This allows you to choose the level of detail in your DEM. It can be left as default on either setting unless your requirements are different.
The advanced options can then be set as usual. Coordinate systems can be chosen and your preferred output format set.
4: Start processing as normal.
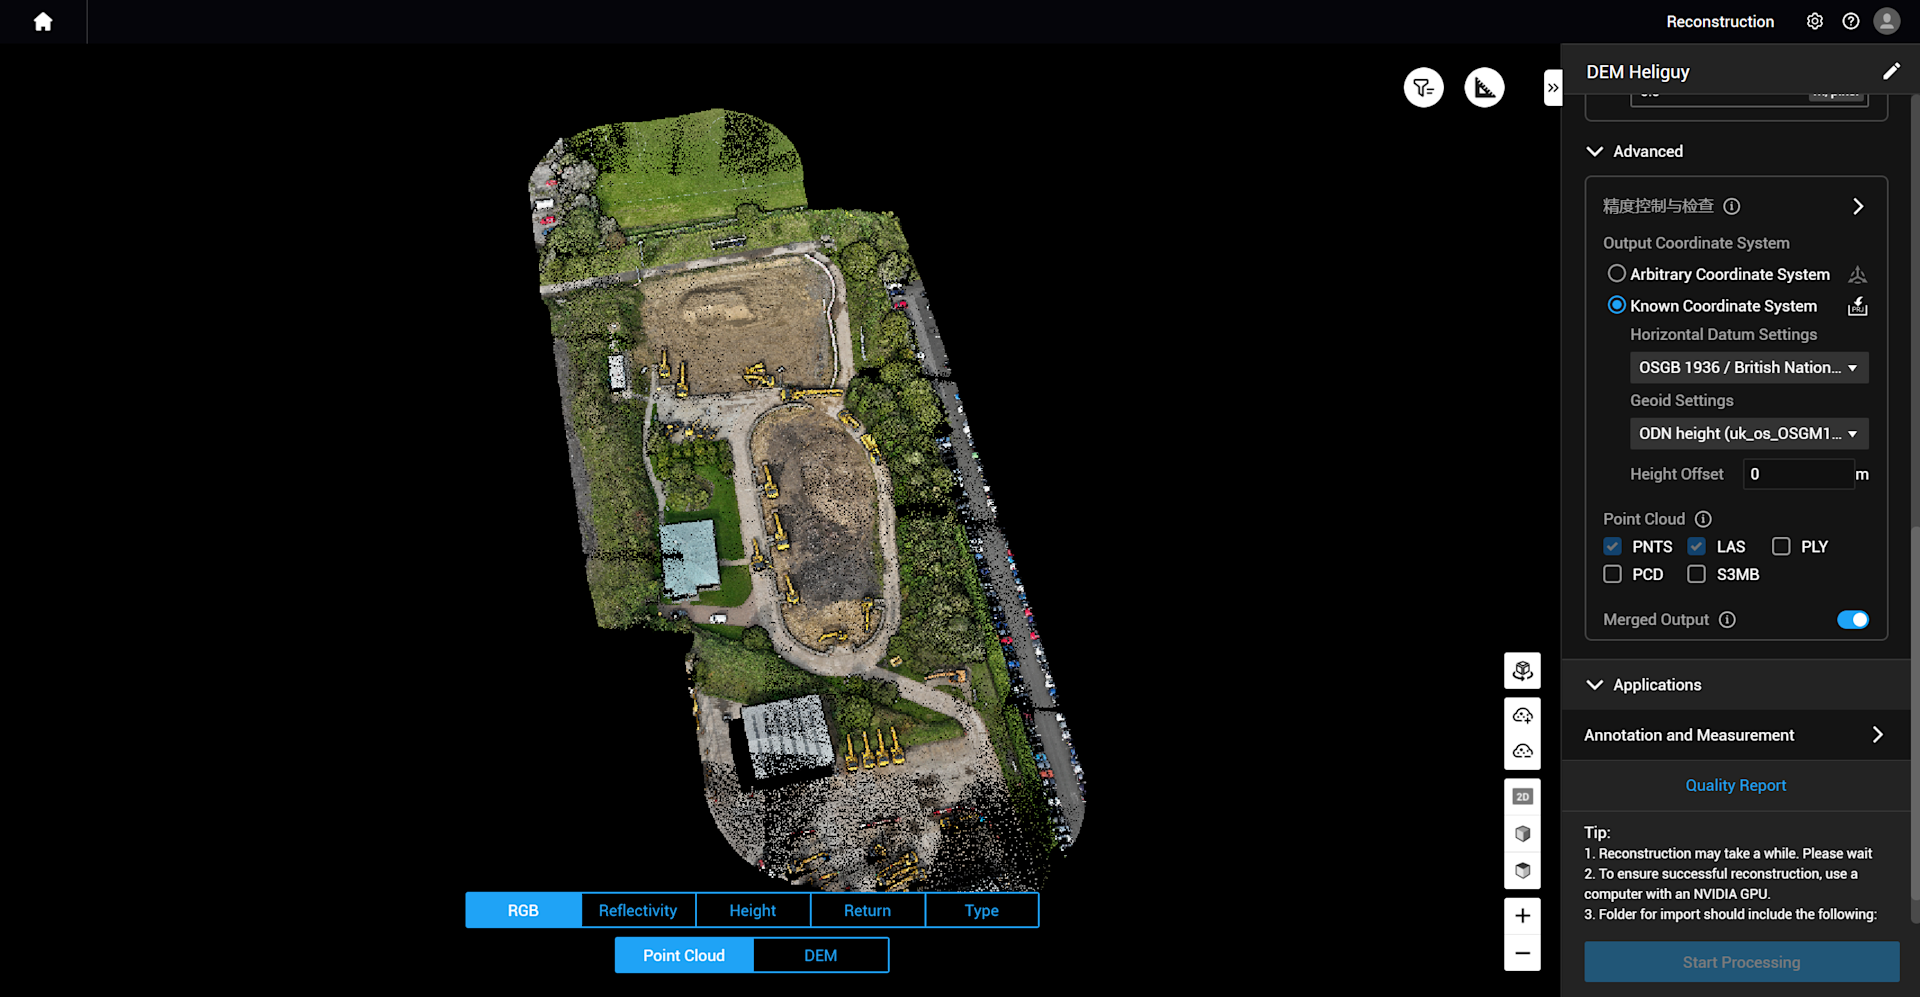
5: Upon completion, your DEM will be displayed by clicking the option at the bottom of the screen.
Elevation values are shown on the left side of the screen with a graduated scale.
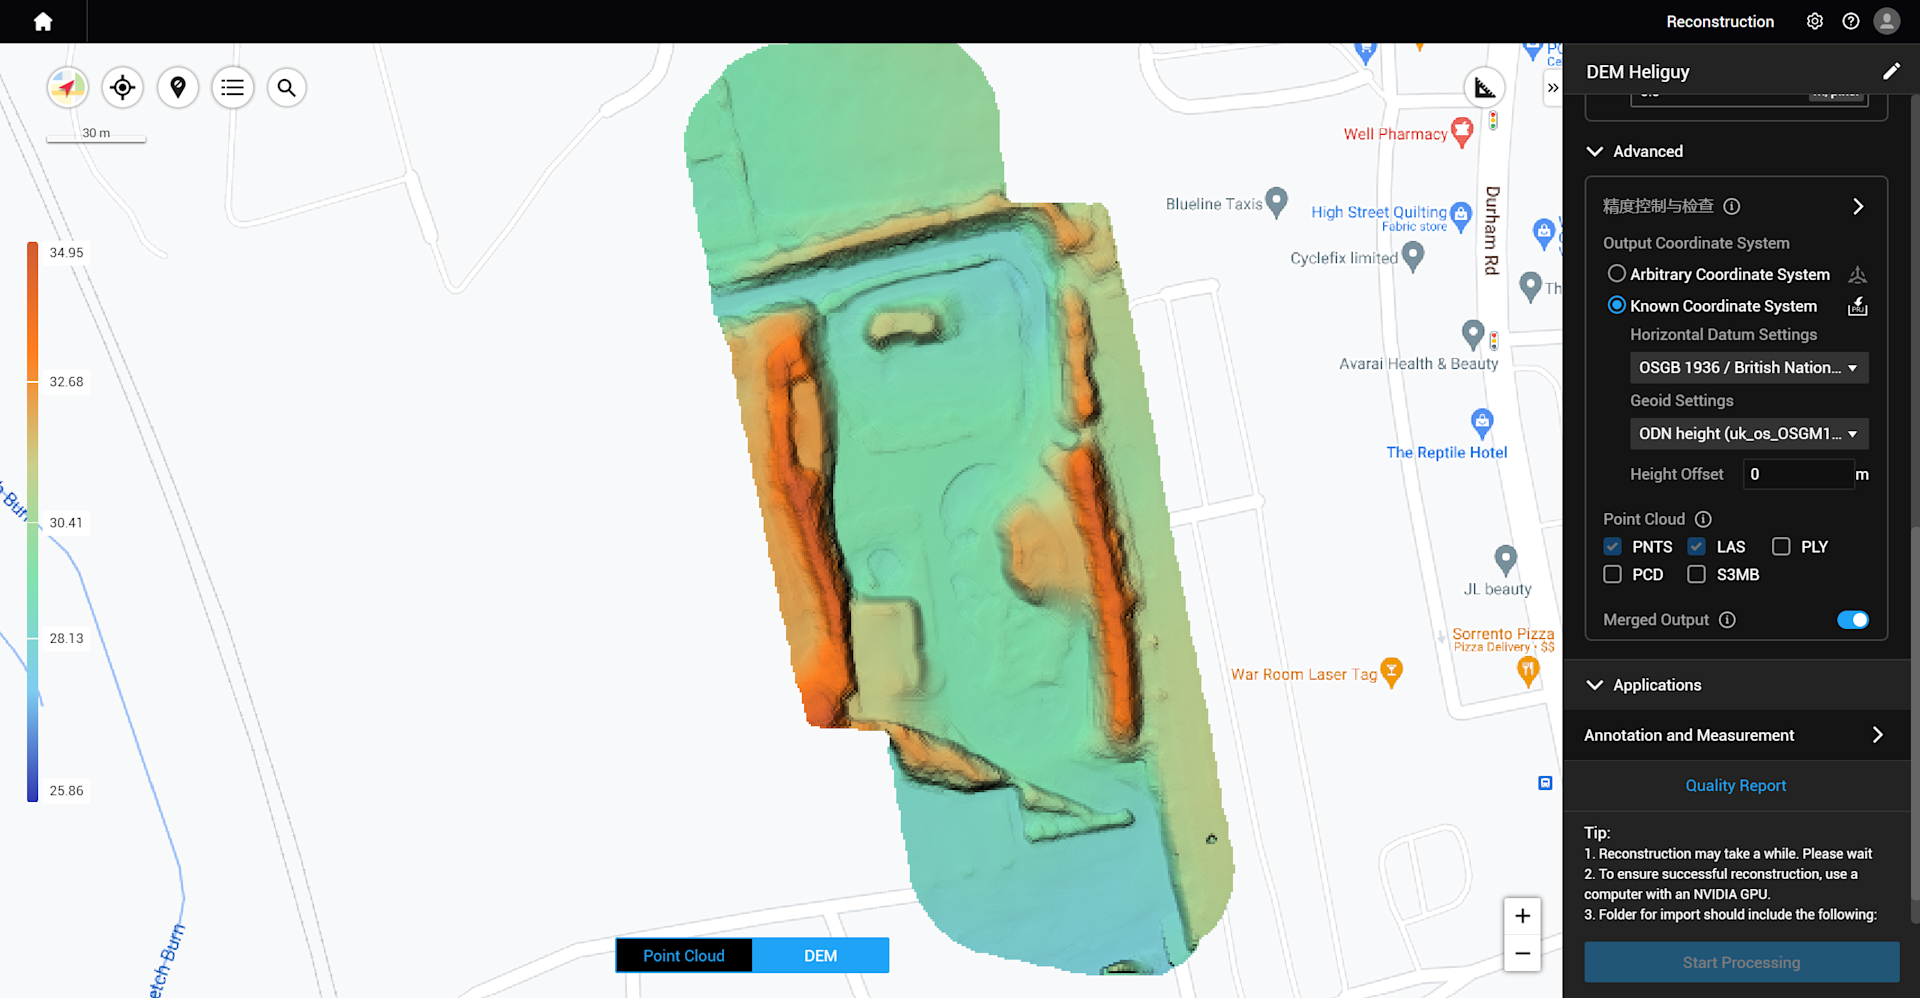
6: DJI Terra will produce two files in your output directory.
A .tif file will be created in \lidars\terra_dem\dem_merged.tif. This is an ideal format for importing into GIS software, for examples QGIS or ArcGIS Pro.
A .png file located in \lidars\report\dem_screennail.png. This is more suited for use in reports for display purposes.

View A LiDAR Dataset Cross-section In DJI Terra: Workflow
DJI Terra now offers the ability to view cross-sections of LiDAR point clouds.
To do this:
1: Click the button, as illustrated by the orange arrow.
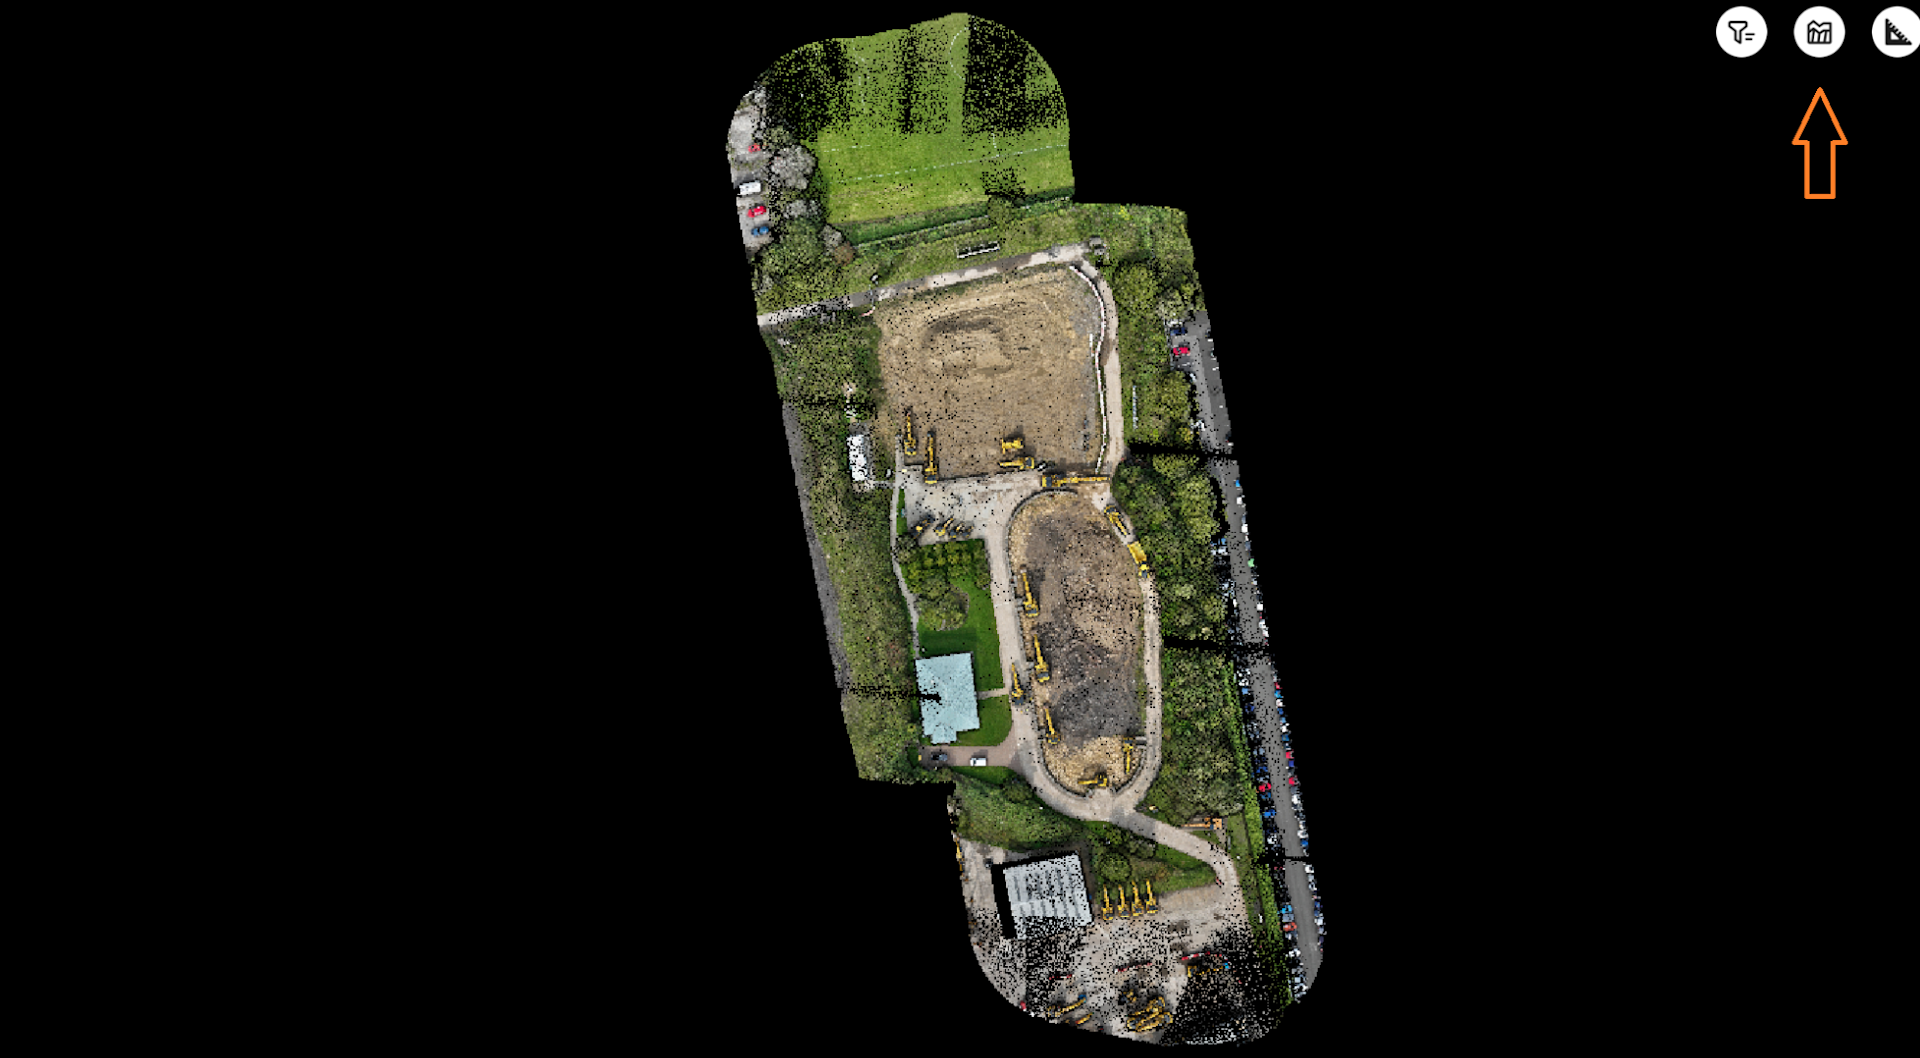
2: Select the profile on the model by left-clicking the mouse to start selection and right-clicking to stop the selection.
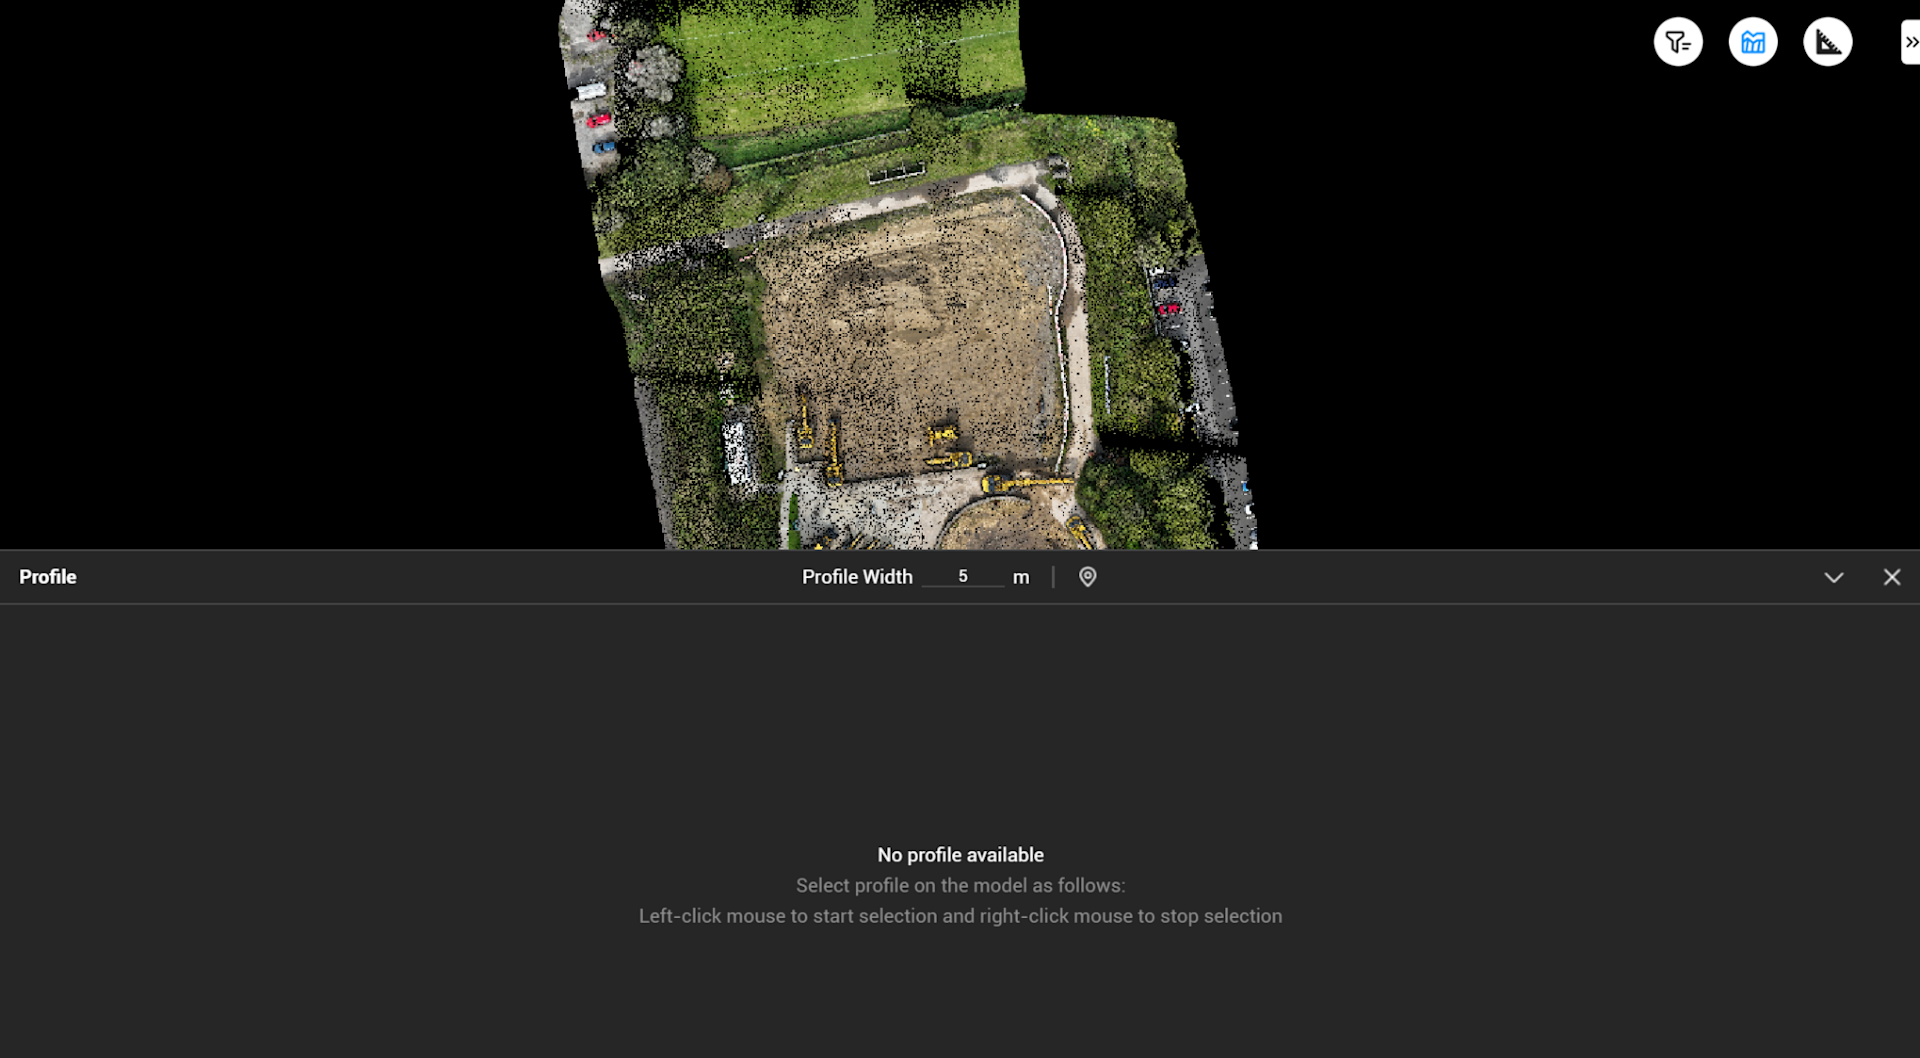
3: The image below shows the selected area (top_ and the subsequent cross-section view (below).

heliguy™ has an in-house surveying team. To discuss DJI Terra and/or the DJI Zenmuse L2 and find out how they can benefit your workflows, contact us.
